NetBox APIs with POSTMAN and Python
Updated:
1. Introduction
This is the first post in a series about using NetBox for network management. In this post, we will:
- Install NetBox-docker
- Exploring NetBox APIs with POSTMAN: we will build a NetBox postman collections for create site, create/modify/delete devices with POST/PATCH/DELETE HTTP methods.
1.1. What is NetBox
NetBox is an open source web application designed to help manage and document computer networks. It encompasses the following aspects of network management:
- IP address management (IPAM) - IP networks and addresses, VRFs, and VLANs
- Equipment racks - Organized by group and site
- Devices - Types of devices and where they are installed
- Connections - Network, console, and power connections among devices
- Virtualization - Virtual machines and clusters
- Data circuits - Long-haul communications circuits and providers
- Secrets - Encrypted storage of sensitive credentials
2. Installation
2.1. Setup Development Environment
In this post, we use a local Windows 10 workstation and an Ubuntu 20.04
virtual machine that will install NetBox-docker. This VM has a NAT IP
address of 192.168.100.147.
We need to add the hostname in Windows 10 host machine at
C:\Windows\System32\drivers\etc\hosts, so that we can access NetBox
GUI from the local Windows 10 workstation.
192.168.100.147 ubuntu
2.2. Install NetBox-docker
We will install Netbox-docker on the Ubuntu 20.04 virtual machine. We need to install docker and docker-compose first.
To install docker-compose on the VM, running the following commands.
sudo curl -L "https://github.com/docker/compose/releases/download/1.26.2/docker-compose-$(uname -s)-$(uname -m)" -o /usr/local/bin/docker-compose
sudo chmod +x /usr/local/bin/docker-compose
docker-compose --version
To install netbox-docker, running the following commands.
git clone -b release https://github.com/netbox-community/netbox-docker.git
cd netbox-docker
tee docker-compose.override.yml <<EOF
version: '3.4'
services:
  nginx:
    ports:
      - 8000:8080
EOF
docker-compose pull
docker-compose up -d
For full details around running Netbox-docker, follow the instructions here.
Once installed, we can access the Netbox GUI on the local Windows 10
host machine at http://ubuntu:8000/.
- Credential: admin/admin.
3. NetBox APIs
3.1. Exploring NetBox APIs with POSTMAN
The NetBox API employs token-based authentication. To know the default
token, navigate to the API tokens page at http://ubuntu:8000/user/api-tokens/.
We will need this token to be set in the Header of our POSTMAN requests.
We can access Netbox API documentation at http://ubuntu:8000/api/docs/.
The API documentation looks something like this.

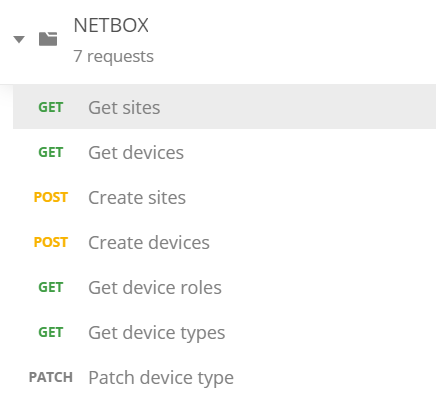
Create the POSTMAN collection and name it as NETBOX.

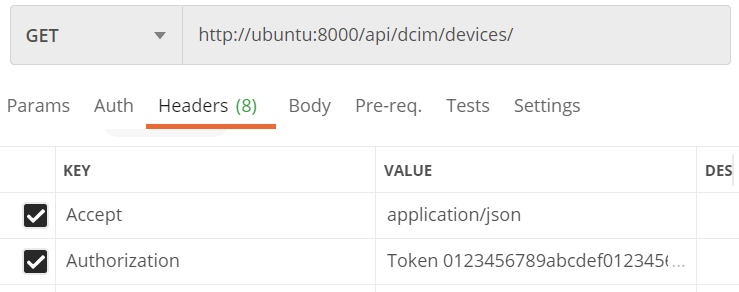
We create the first Get devices RESTCONF request:
- Determine which API we want to use
/api/dcim/devices/. - HTTP method:
GET. - Headers:
- Accept: application/json
- Authorization: Token 0123456789abcdef0123456789abcdef01234567

We continue to create another Create devices RESTCONF request:
- We use the same API
/api/dcim/devices/. - HTTP method:
PUT. - Headers:
- Content-Type: application/json
- Authorization: Token 0123456789abcdef0123456789abcdef01234567
- In this
PUTrequest, we have to define the configuration of the devices we want to create in theBody. For example, we create 2 devices, namelyCORE1andCORE2.
[
    {
    "id": 4,
    "name": "CORE3",
    "device_type": 2,
    "device_role": 2,
    "status": 1,
    "site": 1
    },
    {
    "id": 5,
    "name": "CORE4",
    "device_type": 2,
    "device_role": 2,
    "status": 1,
    "site": 2
    }
]
Send the request and verify the status code returned is 201 Created.
The full POSTMAN collection can be found here.
3.2. Using Python to send the RESTCONF requests
We can go further by using Python to send the RESTCONF requests.
Comments